Post by Evangeline Kane on Apr 8, 2012 1:04:37 GMT -5
Since some people have been interested how I edit my dressage photos, I decided to make this tutorial  I did this in finnish first, so that's why some tutorial photos have finnish texts...
First the program, I use GIMP (free photo editing program) but I'm sure almost anything will do
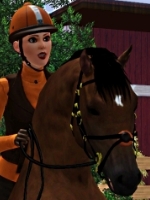
First I take the photos (one good background photo without the horse is essential, then several photos of the horse in different movements so that I get many photos with feet in different positions.
Most movement-pictures I take in trot, only few in walk and canter.
Make sure the lighting is good, especially on the background photo. The horse photos can be taken in middle of night if you take them in the buying/building mode and use the daylight button.
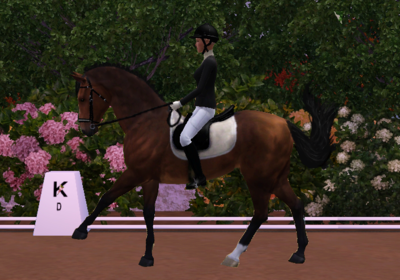
I open the background photo first and add the base photo to a new layer (making sure that the rider's pose is good in that base photo so that I don't have to alter the rider).
After that I look internet for a model photo if the pose I want is more complex and I make sure the model photo is about the same size as the base photo. This model photo wont show, it's just there to help with the leg positions.
Example
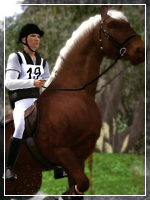
Then I start doing the legs first by opening the photos I took in different window. I always choose the photo that have the leg in as right position as possible, then I crop it and copy-paste it to a new layer of the pose I'm doing. Then I use the "twist-tool" to change the position even more.
I do that with every leg, I don't bother cleaning up yet, I just erase the original leg from the base photo. You can also crop hooves and twist them separately to make the pose even more realistic.
Example
It's good to duplicate the base photo from time to time and hide the older base photo. I do it in case I do errors, it's easier to fix them then.
When you have done the feet, you can alter the head (same way but you can use the most recent base photo so no copy-paste needed).
At this point I combine some layers with each other to make cleaning easier.
The cleaning up is done by cropping and copy pasteing. I fill the holes with those cropped pieces.
i181.photobucket.com/albums/x120/bokkootto/tuto1-2.png
When I have filled all the bigger holes, I use smudge and blur on the showing edges of the filled holes, but very carefully.
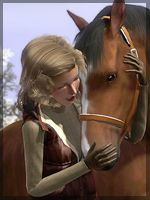
The tail I do with that cropped-pieces thing, but mostly I draw them. There's plenty of hair tutorials in the web
The mane is done by first covering the original mane with that cropped-pieces technique and then cropping ball shape from the tail. They can be round, since it's more easier to change their shapes when those are in the correct position. I put them in row and then I erase and crop them to a right shape
 I did this in finnish first, so that's why some tutorial photos have finnish texts...
First the program, I use GIMP (free photo editing program) but I'm sure almost anything will do
First I take the photos (one good background photo without the horse is essential, then several photos of the horse in different movements so that I get many photos with feet in different positions.
Most movement-pictures I take in trot, only few in walk and canter.
Make sure the lighting is good, especially on the background photo. The horse photos can be taken in middle of night if you take them in the buying/building mode and use the daylight button.
I open the background photo first and add the base photo to a new layer (making sure that the rider's pose is good in that base photo so that I don't have to alter the rider).
After that I look internet for a model photo if the pose I want is more complex and I make sure the model photo is about the same size as the base photo. This model photo wont show, it's just there to help with the leg positions.
Example
Then I start doing the legs first by opening the photos I took in different window. I always choose the photo that have the leg in as right position as possible, then I crop it and copy-paste it to a new layer of the pose I'm doing. Then I use the "twist-tool" to change the position even more.
I do that with every leg, I don't bother cleaning up yet, I just erase the original leg from the base photo. You can also crop hooves and twist them separately to make the pose even more realistic.
Example
It's good to duplicate the base photo from time to time and hide the older base photo. I do it in case I do errors, it's easier to fix them then.
When you have done the feet, you can alter the head (same way but you can use the most recent base photo so no copy-paste needed).
At this point I combine some layers with each other to make cleaning easier.
The cleaning up is done by cropping and copy pasteing. I fill the holes with those cropped pieces.
i181.photobucket.com/albums/x120/bokkootto/tuto1-2.png
When I have filled all the bigger holes, I use smudge and blur on the showing edges of the filled holes, but very carefully.
The tail I do with that cropped-pieces thing, but mostly I draw them. There's plenty of hair tutorials in the web
The mane is done by first covering the original mane with that cropped-pieces technique and then cropping ball shape from the tail. They can be round, since it's more easier to change their shapes when those are in the correct position. I put them in row and then I erase and crop them to a right shape