
Post by Equestriad on Jun 9, 2012 6:21:23 GMT -5
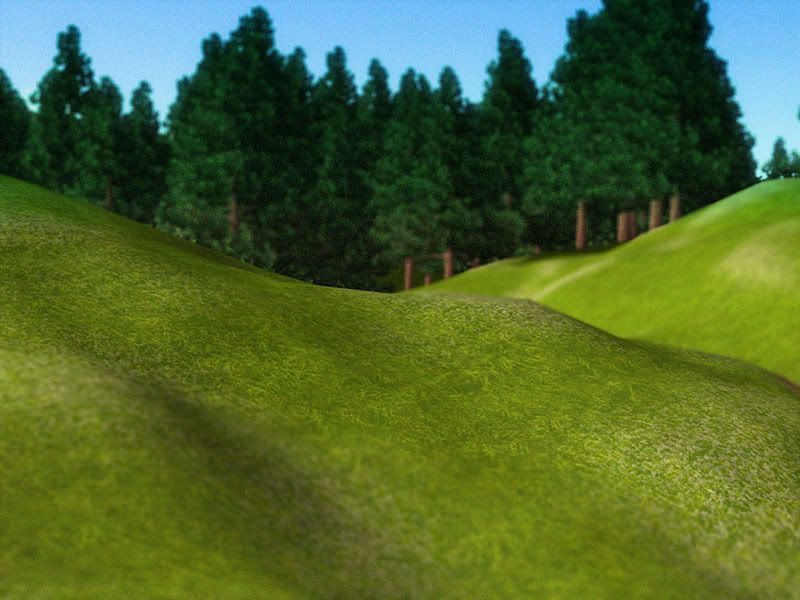
Finished Product
Quick Term Glossary
I treat this as I would photography, just there's ((unfortunately)) no filters on sims 3 - so I have to rely on photoshop.
Neutral Density Filter - I use this term to refer to a grey gradient that I overlay. It can be used for a variety of purposes - the main one being adjusting the light coming in to create a nice 'frothy' effect on a waterfall that's very smooth and milky, however it can also be used to play tricks with how light is distributed.
Polarising Filter - This filter is normally used to control the light coming in - and is often used to make the skies look extra blue, I've used another grey filter to fulfil this, though the exact colour will be shown in tutorial
Skylight Filter - This is used to adjust the 'hue' of the skies in photography and helps with ensuring the colour looks right. In this case I've used a strict blue blend with white at the bottom of the gradient to give the sims 3 skies more colour.
All the above 3 'filters' are made using gradients to give the effects btw
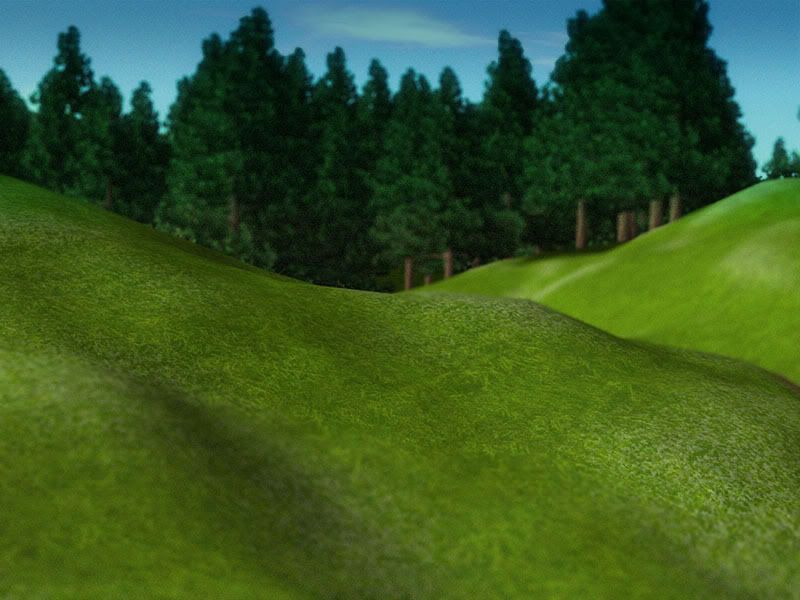
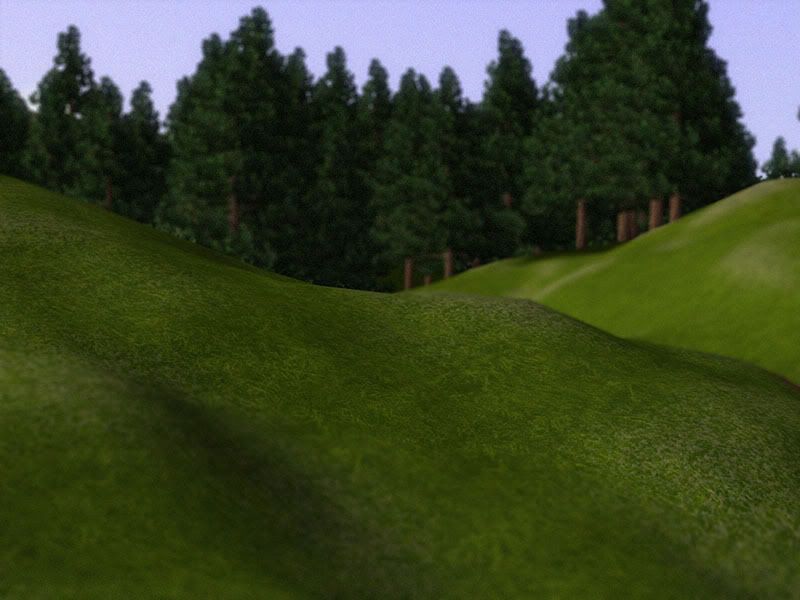
Right this is using some things from Kaleeko's video tutorial ((Which works wonders for landscapes)) and some things of my own experimentation. If you want to feel free to use the original image I worked on which is this. Which is also our starting point.
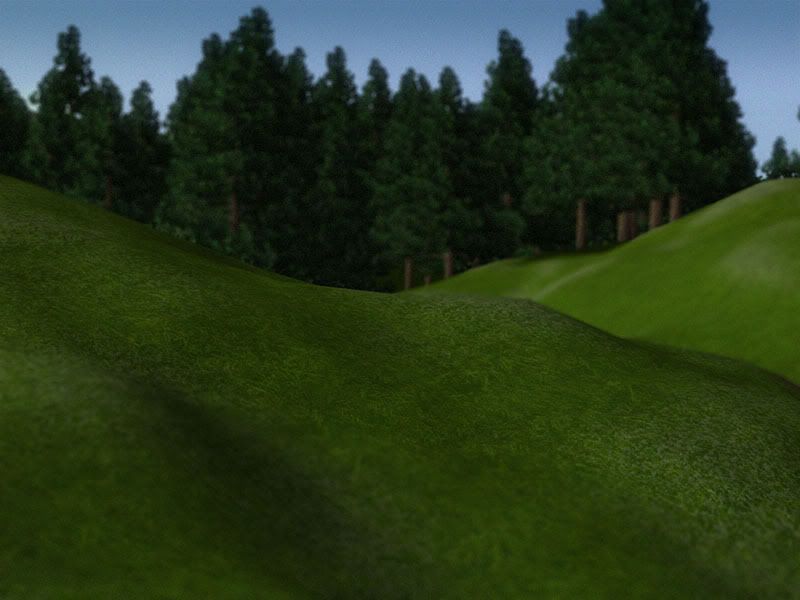
So here's the starting image:

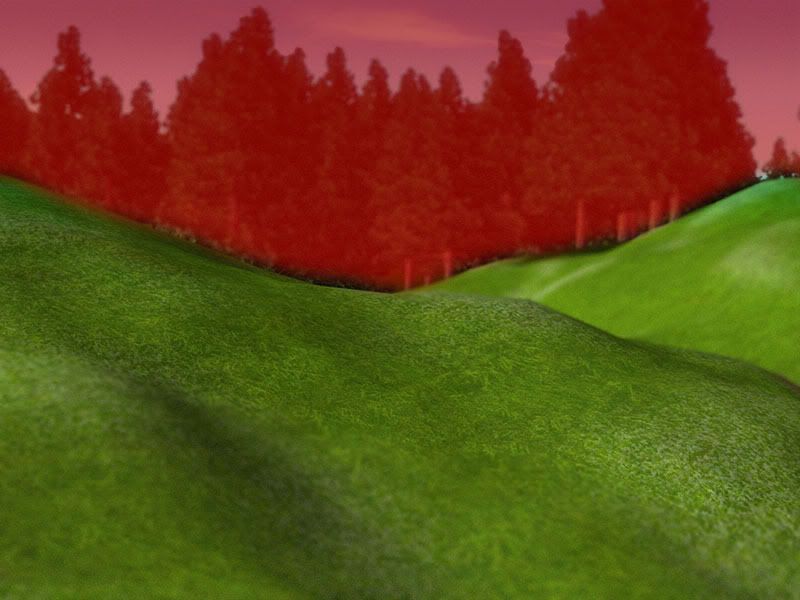
The first thing I did to this image was to create two Alpha Channels to mask two different areas. The first channel focused on just masking the background as shown here (Red shows the areas that will be selected))
The second was to mask in the areas that should be blurred in the mid and foreground of this shot.
Following this as in Kaleeko's video tutorial I loaded the filter menu and used the Lens Blur, blurring the background out first by selecting Alpha 1, then repeating with a smaller amount of blur and selecting Alpha 2 to blur the midground and foreground - which left me with this.
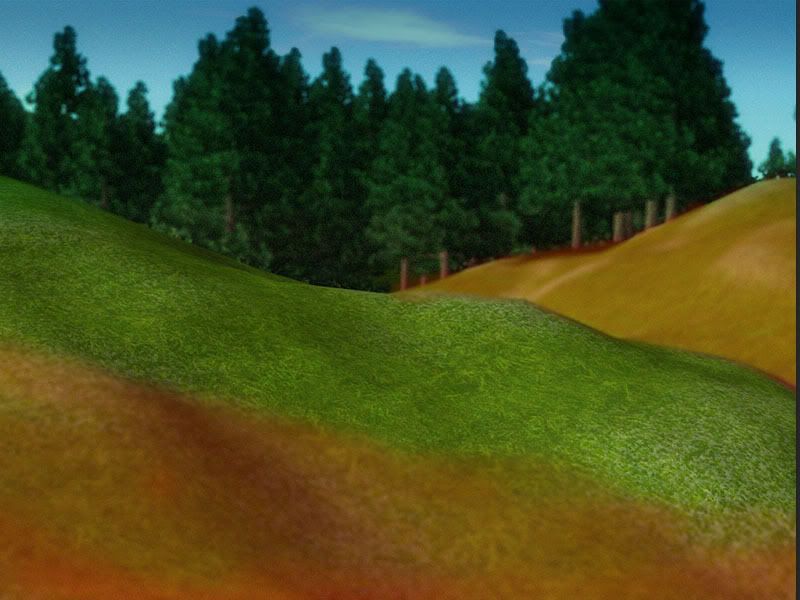
Once I'd done that I started to create the 'filters' that I'd have normally used on a camera, the first one been the neutral density filter which looked like this:
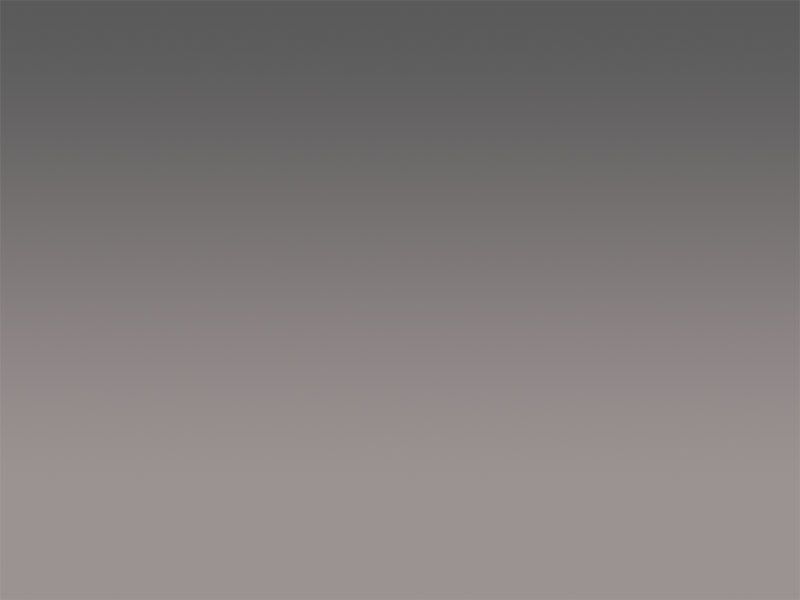
As you can see its just a simple grey to lighter grey gradient, that's set to soft light overlay to the image to give this effect:

As you can see it darkened the foreground, lightened the background.
Once this was done I added the skylight filter in which looks like this:
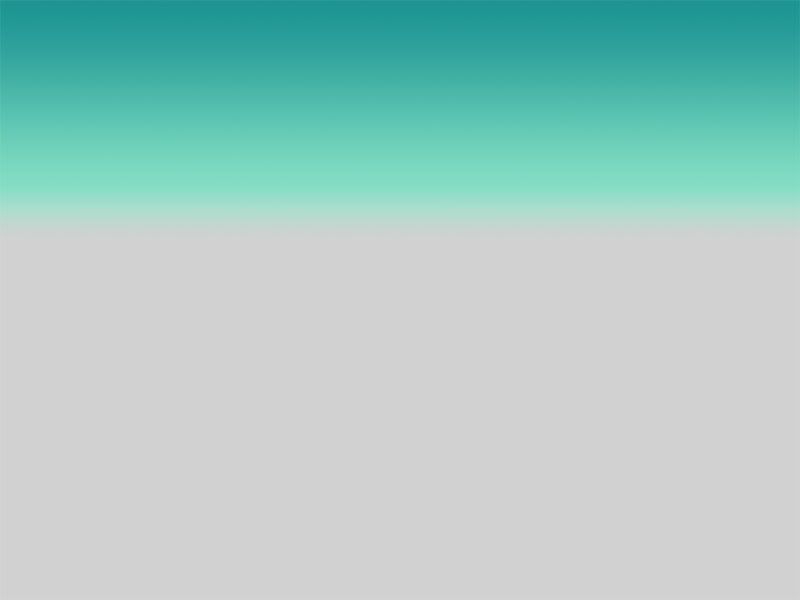
This alone gives this type of effect to the image when set to overlay:
However with the Neutral Density Filter beneath it looks now like this:
Much better - yes?
The final of my filters I added was polariser filter. This is normally the most important one for any camera user shooting in sunny conditions as it gives the skies a 'wow' feeling - this is what my polariser filter layer looks like in Photoshop:

On the image with no other layers underneath it it looks like this, set to Hard Light:
As you can see this alone has brought more blue into the sky, however with the other 'filter' gradient layers underneath however it looks like this:
The final step - and this is optional - is to add clouds on, I did a quick google search for clouds and chose one, and placed it over. This layer is placed between my sky and polariser layer and is set to Lighten. To keep it in place without overlaying the other layers it was cut out around the forested trees so it looks on its own like this:
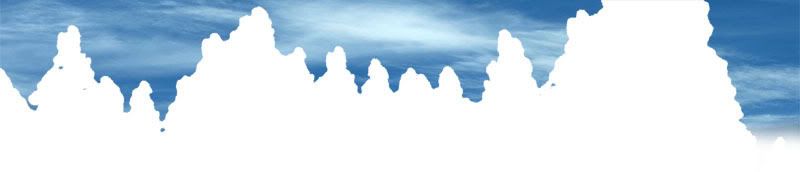
(Note that this is saved as jpeg the white area is transparent normally))
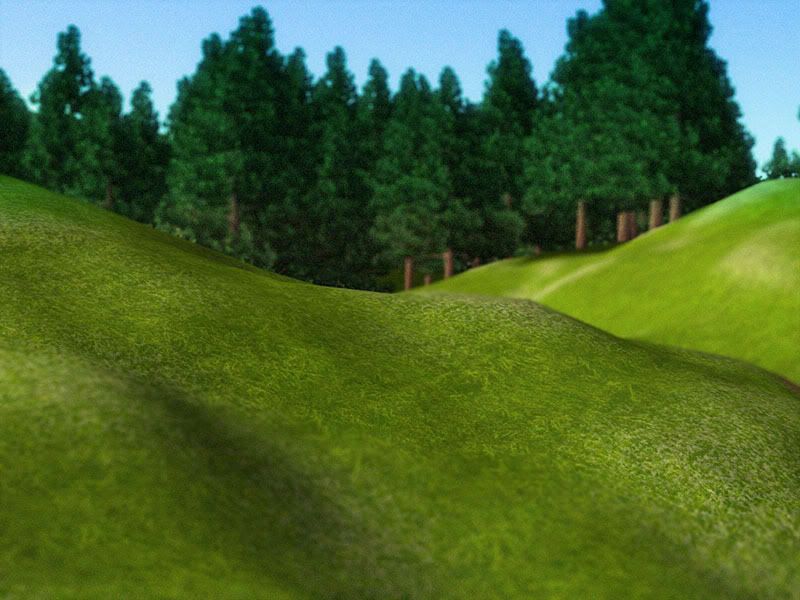
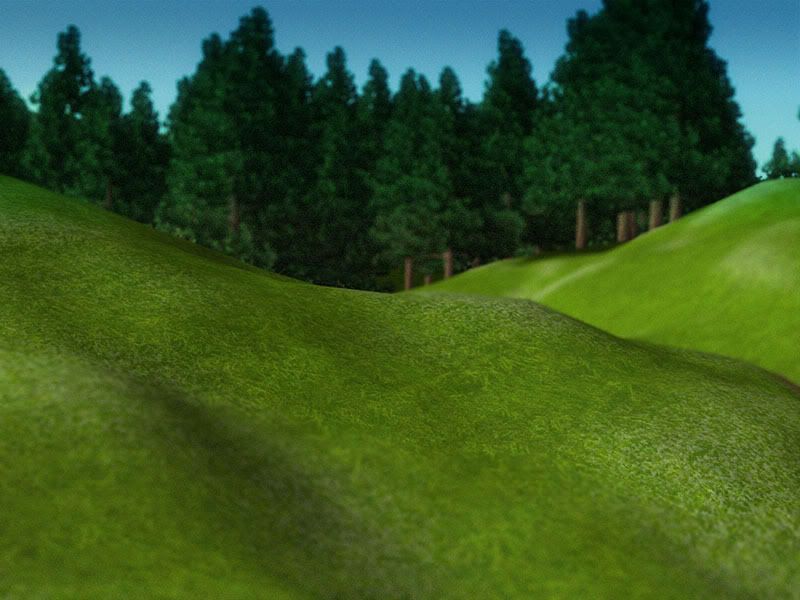
And in the finished image it looks like this:
So that's how I made that shot, enjoy, hope its useful?
Quick Term Glossary
I treat this as I would photography, just there's ((unfortunately)) no filters on sims 3 - so I have to rely on photoshop.
Neutral Density Filter - I use this term to refer to a grey gradient that I overlay. It can be used for a variety of purposes - the main one being adjusting the light coming in to create a nice 'frothy' effect on a waterfall that's very smooth and milky, however it can also be used to play tricks with how light is distributed.
Polarising Filter - This filter is normally used to control the light coming in - and is often used to make the skies look extra blue, I've used another grey filter to fulfil this, though the exact colour will be shown in tutorial
Skylight Filter - This is used to adjust the 'hue' of the skies in photography and helps with ensuring the colour looks right. In this case I've used a strict blue blend with white at the bottom of the gradient to give the sims 3 skies more colour.
All the above 3 'filters' are made using gradients to give the effects btw
Right this is using some things from Kaleeko's video tutorial ((Which works wonders for landscapes)) and some things of my own experimentation. If you want to feel free to use the original image I worked on which is this. Which is also our starting point.
So here's the starting image:
The first thing I did to this image was to create two Alpha Channels to mask two different areas. The first channel focused on just masking the background as shown here (Red shows the areas that will be selected))
The second was to mask in the areas that should be blurred in the mid and foreground of this shot.
Following this as in Kaleeko's video tutorial I loaded the filter menu and used the Lens Blur, blurring the background out first by selecting Alpha 1, then repeating with a smaller amount of blur and selecting Alpha 2 to blur the midground and foreground - which left me with this.
Once I'd done that I started to create the 'filters' that I'd have normally used on a camera, the first one been the neutral density filter which looked like this:
As you can see its just a simple grey to lighter grey gradient, that's set to soft light overlay to the image to give this effect:
As you can see it darkened the foreground, lightened the background.
Once this was done I added the skylight filter in which looks like this:
This alone gives this type of effect to the image when set to overlay:
However with the Neutral Density Filter beneath it looks now like this:
Much better - yes?
The final of my filters I added was polariser filter. This is normally the most important one for any camera user shooting in sunny conditions as it gives the skies a 'wow' feeling - this is what my polariser filter layer looks like in Photoshop:
On the image with no other layers underneath it it looks like this, set to Hard Light:
As you can see this alone has brought more blue into the sky, however with the other 'filter' gradient layers underneath however it looks like this:
The final step - and this is optional - is to add clouds on, I did a quick google search for clouds and chose one, and placed it over. This layer is placed between my sky and polariser layer and is set to Lighten. To keep it in place without overlaying the other layers it was cut out around the forested trees so it looks on its own like this:
(Note that this is saved as jpeg the white area is transparent normally))
And in the finished image it looks like this:
So that's how I made that shot, enjoy, hope its useful?

