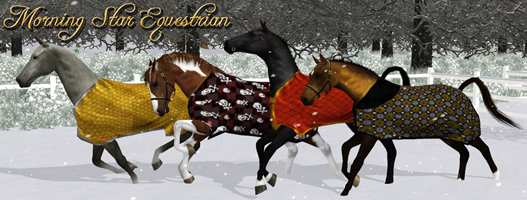
Post by Walden@Equus on Dec 20, 2012 0:57:59 GMT -5
Q: What will this tutorial do for you?
A: Well, it will help you add logos to an item of YOUR CHOICE!
Q: What is TSRW?
A: It is The Sims Resource Workshop
Q: Where do I download it?
A: Here!
Q: Anything else I need?
A: An image editing program. You do NOT need a plugin!
---------------------------------------------------------------------
When you load up TSRW it will show the window (below)

To start a new project, click CREATE A NEW PROJECT
This will bring up the next window (below)
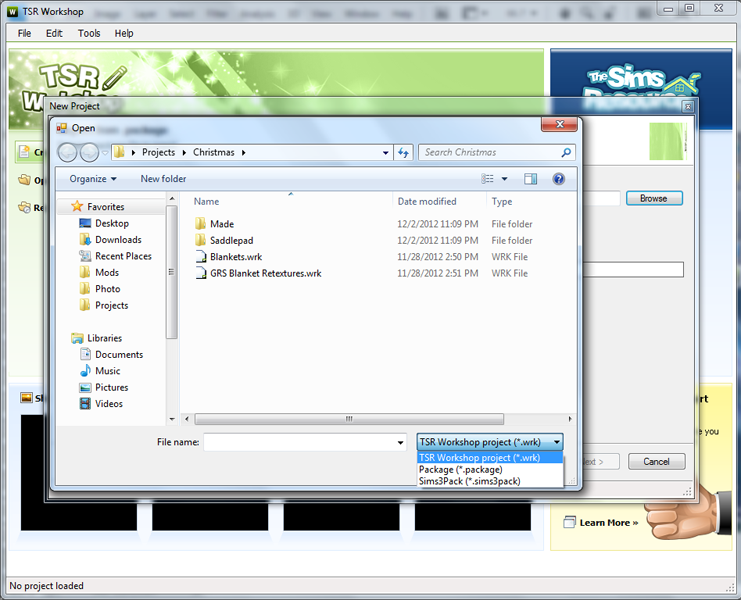
You can browse for .wrk .package or .sim3pack
Find your file and tell it to open!
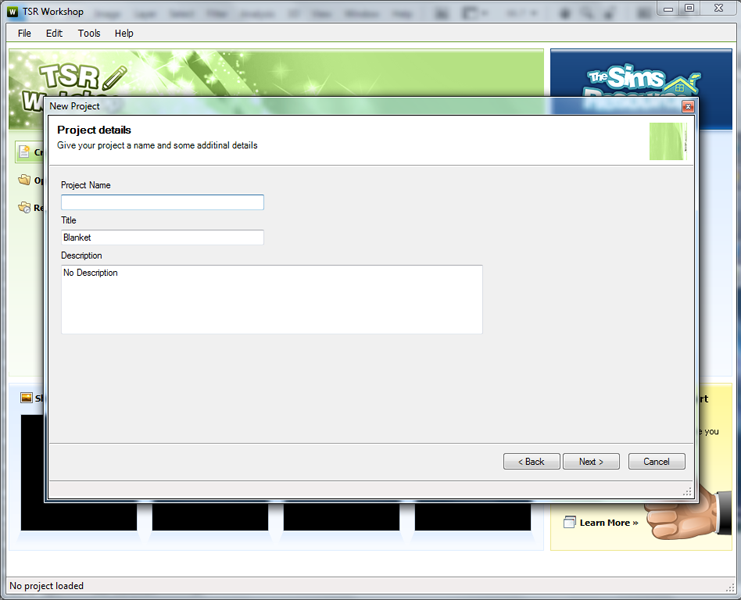
You will see this screen.
Project Name - This is really more-so for personal reasons. If you wanan name it, name it.
Title - This is what shows up in the launcher, essentially this is the name of your item.
Description - Add something quirky about your item! Descriptions can be fun ;D
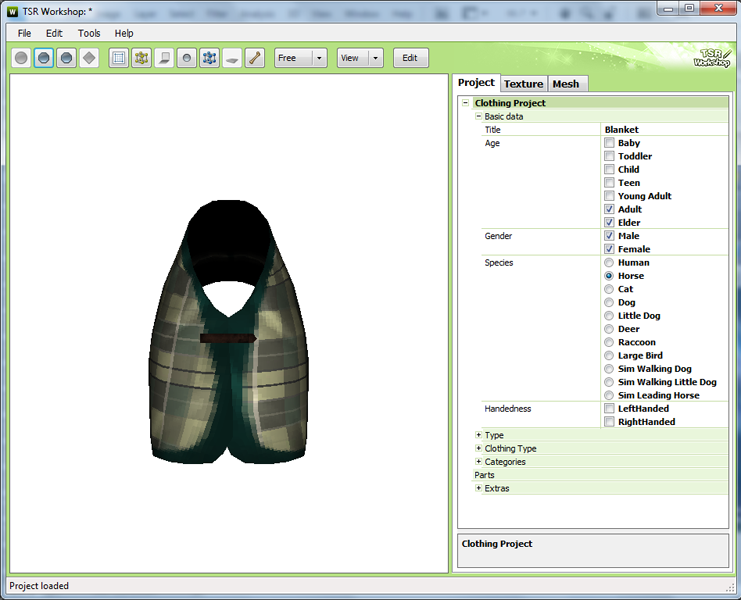
When you load an item, it'll look like this.
You notice there are some tabs and some propteries and things you can click and change. Take note of them, but you do not need to mess with them if you're doing something simple, like adding a logo!
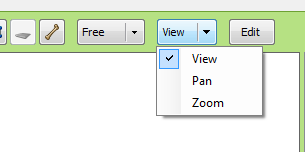
If you noticed before your item may not be at the angle you like. How can you fix this? There is this little button that says VIEW at the top. See it?
When you click it it gives you 3 options.
View - Rotates the item around
Pan - Moves the item (such as left/right up/down)
Zoom - Zooms in and out.
Q: How do you use these?
A: Click and drag!
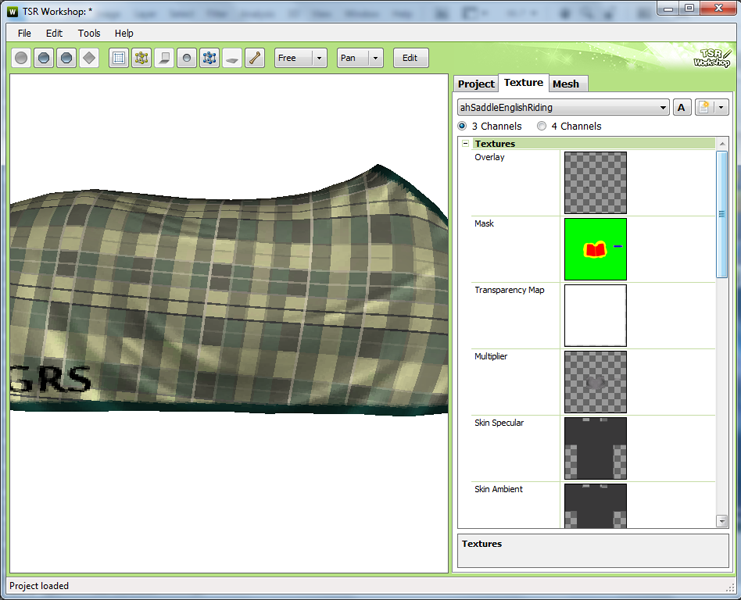
Now that you have your image the position you want, click the TEXTURE tab. This is where retexturing will happen.
There are only three layers you need to worry about.
Overlay - This is like an image overlay, it can be any color!
Mask - Mask are very tricky! They have to deal with alphas. Here is a basic mask editing tutorial!
Multiplier - This is what gives the item texture and depth. You can make it have an underlying texture such as if its quilted!
DON'T TOUCH THE OTHER ONES
If you notice below the Texture tab there are these little buttons and such.
A - Don't really have to worry about this.
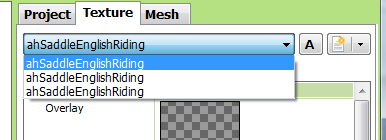
The Drop Down Menu - This is how you navigate to multiple retextures in your project!
The thing on the right - It gives you a few options: Delete, Duplicate, Export, Move Up, and Move Down. You only need to worry about the Delete and Duplicate. Delete will delete the CURRENT retexture you're viewing. Duplicate will CREATE ANOTHER item for you to retexture.
When you select a layer, such ask mask, it will bring up a new window.

the top will look like the above.
You only need to work with IMPORT and EXPORT.
When Exporting - I highly suggest exporting whatever you are working on even if you think the layer is EMPTY[/u]. EXPORT IT AS A .PNG, this makes it so much easier for you to deal with! You can rename it to whatever you want!
When Importing - It's easy as pie! Just click IMPORT and then navigate and find what you want to import!
Once you have imported a new mask/overlay/texture, the below window will appear.
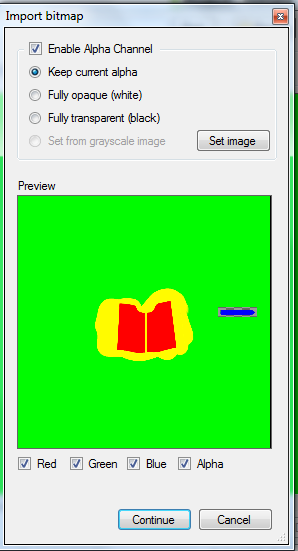
JUST CLICK CONTINUE
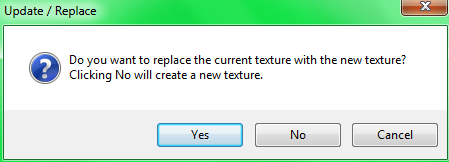
Click No.
I always do. Sometimes when I click yes it will replace OTHERS in your project with what you just imported.
And bam. You've retextured!
A: Well, it will help you add logos to an item of YOUR CHOICE!
Q: What is TSRW?
A: It is The Sims Resource Workshop
Q: Where do I download it?
A: Here!
Q: Anything else I need?
A: An image editing program. You do NOT need a plugin!
---------------------------------------------------------------------
When you load up TSRW it will show the window (below)
To start a new project, click CREATE A NEW PROJECT
This will bring up the next window (below)
You can browse for .wrk .package or .sim3pack
Find your file and tell it to open!
You will see this screen.
Project Name - This is really more-so for personal reasons. If you wanan name it, name it.
Title - This is what shows up in the launcher, essentially this is the name of your item.
Description - Add something quirky about your item! Descriptions can be fun ;D
When you load an item, it'll look like this.
You notice there are some tabs and some propteries and things you can click and change. Take note of them, but you do not need to mess with them if you're doing something simple, like adding a logo!
If you noticed before your item may not be at the angle you like. How can you fix this? There is this little button that says VIEW at the top. See it?
When you click it it gives you 3 options.
View - Rotates the item around
Pan - Moves the item (such as left/right up/down)
Zoom - Zooms in and out.
Q: How do you use these?
A: Click and drag!
Now that you have your image the position you want, click the TEXTURE tab. This is where retexturing will happen.
There are only three layers you need to worry about.
Overlay - This is like an image overlay, it can be any color!
Mask - Mask are very tricky! They have to deal with alphas. Here is a basic mask editing tutorial!
Multiplier - This is what gives the item texture and depth. You can make it have an underlying texture such as if its quilted!
DON'T TOUCH THE OTHER ONES
If you notice below the Texture tab there are these little buttons and such.
A - Don't really have to worry about this.
The Drop Down Menu - This is how you navigate to multiple retextures in your project!
The thing on the right - It gives you a few options: Delete, Duplicate, Export, Move Up, and Move Down. You only need to worry about the Delete and Duplicate. Delete will delete the CURRENT retexture you're viewing. Duplicate will CREATE ANOTHER item for you to retexture.
When you select a layer, such ask mask, it will bring up a new window.
the top will look like the above.
You only need to work with IMPORT and EXPORT.
When Exporting - I highly suggest exporting whatever you are working on even if you think the layer is EMPTY[/u]. EXPORT IT AS A .PNG, this makes it so much easier for you to deal with! You can rename it to whatever you want!
When Importing - It's easy as pie! Just click IMPORT and then navigate and find what you want to import!
Once you have imported a new mask/overlay/texture, the below window will appear.
JUST CLICK CONTINUE
Click No.
I always do. Sometimes when I click yes it will replace OTHERS in your project with what you just imported.
And bam. You've retextured!


 And blue is used interchangeably for magenta. She could have made the green red or left it empty, which would look more like you're used to.